Tuesday, August 31, 2010

Thinking Ahead


Xmas Boxes.


This picture shows five empty boxes, four of these having been covered with Christmas wrapping, the one in the middle at the back has not been covered. All boxes originally contained things like J.Cloths, tea-bags, biscuits and other such packaged kitchen 'stuff'.


It doesn't matter if there is any printing on the outside of a box, as long as it is plain inside. Carefully prise the glued part of the box open and press it out flat. Lay the printed side face down on the paper and draw a line round the box about a quarter inch beyond each edge, then remove box and cut the paper where marked. Place the box back on the paper and brush paste or glue on the outside edge of the box )or on the paper that is visible) and fold the paper over so that it is firmly (AND NEATLY) fixed to the card. When the glue is dry, re-assemble the box, in the shape it was before, glue the sides back in place as necessary.


A really good gift can be made by 'exploding' a box that once held paper hankies or tissues. The plan is to cover this with fabric, and then re-assemble to make a slightly larger 'box' that can be slipped over a full box of tissues.


As the fabric covered box has to be slightly larger to enable it to fit over a similar box, this - once laid flat -needs to be cut along the folds (sides and ends) and then the pieces placed on the back-side of the fabric, very slightly apart before being glued glued down . Snip the material where it covers the hole (where the tissues are pulled through) and fold this back underneath and also glue down. To make it look really neat, the inside of the box can also be covered with material.


When folding the box back together, glue the ends to the internal flaps, or stitch the corners together, and then the box is ready to give as a gift (with - of course - a full box of hankies inside).


The next photo today is not just for Christmas (but the idea could work when decorating any anniversary cake, even a Christmas Cake) mainly to show how much cheaper it is to cook/decorate our own than have it done professionally.


The cake shown was made for our daughter's wedding - she made the cakes, I did the icing - and although the photo is in black and white, the main part of the cake was a very pale apricot/peach coloured royal icing, with the decoration in plain white icing.


Nowadays, most cakes are covered in fondant icing, very easy to work, but in my opinion yucky (aka sickly)to eat, and have heard that royal icing is about to make a come-back, so worth practicing as you may wish to use it in the years to come.


When a cake is covered in royal icing, it is easy enough to get the top and sides smooth as long as you remember to put thin layers of icing over the marzipan and let each dry before adding another. Adding a new layer each day can take up to a week to get a really smooth effect. But always, ALWAYS, I found that where the top and sides meet it was never very tidy. Also there were what I called 'pock marks' towards the edges (often where air bubbles had been in the icing). Some cake-makers use sandpaper to smooth rough bits off the icing, I used the flat side of a knife slid across the cake.


To disguise these marks and neaten the edges, with the above cake, I filled a syringe (with a nozzle having a small round hole) with icing, and then piped a continuous 'squiggly' line over any damage to the icing and also carrying this over the rim. Then finishing off with tiny stars around each 'curve''. The bits hanging down between the curves that were bought cake decoration flower buds (white) that came fastened to white stems.


The rough base of the cake - also difficult to ice cleanly - was neatly covered with a ribbon of silver trimming - also bought - with a few roses made of icing stuck here and there. I may have made the icing roses, as was quite good at making these.


Now - when you consider how expensive it is to buy a wedding cake (or any decorated cake for that matter), if our children are still young, we then have ample time to practice before they flee the nest. For starters, It is practice icing tecniques using firm mashed potato instead of sugar icing, and pipe onto baking parchment or a box or something, but never on a cake. From there you can progress to using butter icing and decorate fairy cakes and Victoria sponges etc.


Fragile decorations made with royal icing need a firmer icing than that used when covering a cake. A little gum tragacanth added helps to prevent the icing breaking if piping out lace patterns etc. But only use this for decorating, not add to the main icing, as it would then become too hard to eat.


For the main body of the cake, add a few drops of glycerine to the icing when beating the egg white and icing sugar together. No noticeable difference in the icing when using, but this does make the icing easier to cut with a knife without the icing breaking up shattering. The first wedding cake I made (for a friend) I did not use glycerine, and the icing was so hard it bent the silver knife used to cut the cake. My cry of "I knew I shouldn't have used Polyfilla" made everyone laugh, and hopefully saved the day.


Before icing, always allow marzipan to dry out (uncovered) at room temperature for at least a week before icing, or the marzipan will discolour the royal icing.


Always make enough icing to cover all the cakes when there are several tiers, especially if the icing is to be coloured, for it is impossible to get a perfect colour-match if a new batch has to be made. Royal icing, once made, keeps very well in a bowl if it is first covered with a wet towel (well wrung out), and this then covered with a plate or something to prevent the air getting in. The damp towel keeps the air in the bowl moist, and this prevents the surface of the icing drying out.


Monday, August 30, 2010

Crafts and Cooking.

The photo below was taken when preparing for a demo. At the front you see a pack of 6 Scotch Pancakes (aka drop scones). Ingredients to match the cost of the bought pancakes were mixed together then cooked to see how many Scotch Pancakes could be made (and of the same size - that's important when comparison costing), and you see the result below.

Had written on the back of the
photo that 30 had been made
for the price of 6 bought,
but it appears to show only 25.
Maybe there is one more hidden at
the back of each row. Not
important, for it is obvious
that home-made is far cheaper.
These pancake freeze well.


This last photo today shows a Xmas 'Sampler'. Have made many such 'samplers' (some have been copies of samplers made centuries ago, and they all looked very authentic (unless you stand close enough for your nose to touch the glass). To make these, all you do is find a frame that still has glass, and some linen type cloth (if using old sheeting, rinse in a little tea to make the fabric look 'old').
Take some marker pens (the sort that teachers use to write on celluloid), and lay the (clean) glass over a chosen picture. This can either be copied from a magazine onto graph paper, or the glass laid over a page in a magazine that already has a cross-stitch diagram printed.
Then carefully make little 'x's on the glass using the chosen coloured pen. What has to be remembered is that because the glass will be turned over so that the marks then lie against the linen, any lettering has to be written back to front. The best way to do this is write the letters on the front of the glass, and then turn the glass over and then copy over them on the 'inside'. When completed, wipe the letters off the front of the glass.
If wishing to form straight lines, do not use a ruler. Ruled straight lines look false, and the slight 'wobble' when drawing short straight 'stitches' by hand gives the appearance of real embroidery (a reminder of this given at the side of the pic).

Fit the backing fabric over some firm card that fits into the frame, lay the glass on top with the painted side against the material), and then fit the frame over, making sure the whole lot are fixed firmly together (as when framing a normal picture).
Full details of how to make these cheat's samplers are given in 'Have a Goode Year'. On the back cover of this book can be seen another 'sampler' hanging on the wall.

We used to bring this sampler out
every Christmas, and hang it on
a wall. Later,when all the
grandchildren had grown
up, gave the sampler away.
Wish I hadn't now, but at least
am able to remember it, now
I have found the photo again.
When making these 'sampler's
it is not necessary to use a
ruler, a little 'wobble' here and
there give the impression of
'real' stitching.
So no need to throw an old
frame away. Use it!

Pictures to come will be not just mats, but doll's furniture also made from old clothes pegs. Some more foodie pics, and even a wedding cake (I did the icing, the cake was made by my daughter).
Even managed to scan some photos of the christening dress made for our grandchildren, although not THAT clear, at least gives a good idea of what can be made from a length of white lawn and some basic embroidery stitches, and a length of cheap lace.

Many readers do have 'craft skills', and myself - although not very good at most of them - do enjoy trying to find new ways to use these. So hoping two of the above pics will have shown that if we can't have the real thing, by cheating we can often end up with something very similar, and possibly more enjoyed because of it.

Over forty years ago did make a proper 'stitched' sampler (my daughter in Ireland now has this), and although not very big, it took weeks to complete. The 'cheat's version (above) - once the design has been chosen need only take an hour (couple at most) to complete the whole thing - including framing.

Sunday, August 29, 2010

Win Some, Lose Some...

To show what IS worth growing - even indoors, this first photo is a great example. Beginning in the spring, have sowed box after box of these (at three week intervals) and they have kept us is salads. Just used an empty Value Pack plastic mushroom box filled with compost and just a pinch of the mixed seeds grew the amount shown below - these shown were only three weeks old and barely ready to to pick. They grew even larger, and some changed to a deeper green or bronze the following week.

Cannot now remember, but
believe there were at least
six different types of salad
leaves in the free packet of
seeds that came with the
Lakeland catalogue.
Looking closely, you can see
the different leaf shapes,
each a different 'flavour'.

So the salad leaves at least were a success, and because only a pinch of seeds needed for each sowing, still have plenty left (having several packets of Mixed Salad Leaves from various sources, most of them free). It is said these will grow throughout the winter on a window sill, but take about longer to grow to maturity than in the warmer months of the year.

One thing I have noticed is, that a small amount of home-grown produce (when eaten) is much more enjoyed than a large amount of the supermarket same. Perhaps it is because our own-grown is limited that we appreciate what we have so much more - and because the flavour really is there (and so good) we tend to let it linger in our mouths longer.

So obviously the way to bring the flavours of the past back into our lives is to hunt out produce of quality (maybe fish and meat from a good supplier - have written about this in length before), and grow our own or go to local farmer's markets rather than buy from the supermarkets. And cook all our meals ourselves.

As we are coming up to the season where we start our pickling and preserving, here a few recipes that I hope you find useful. Although most store well, I begin with one that has a short shelf-life, useful when we have and oddments of vegetables in our fridge. Worth making this 'instant piccalilli' when we serve cold meats and salads on the warmer 'Indian Summer' days (that we still hope to get). As with any recipe such as this, weights can be approximate, more of one thing, less of another - according to what we have - as long as the total weight remains the same. All the vegetables need to be cut into bite-sized even pieces.
InstantVegetable Pickle: makes about 1lb (450g)
half small cauliflower, cut into florets
2 carrots, sliced
2 ribs celery, sliced
chunk white cabbage, shredded
4 oz (100g) runner or string beans, cut into chunks
2 cloves garlic, sliced
1 or more (to taste) fresh chillies, whole or sliced (opt)
2" (5cm) piece of root ginger, peeled and sliced/grated
1 red bell pepper, diced
juice of 2 lemons
salt
half teaspoon turmeric
7 tblsp white wine vinegar
1 tblsp sugar
5 tblsp olive oil
Put the prepared vegetables into a colander and sprinkle over a teaspoon of salt. Toss well, and leave to stand over a bowl for at least 4 hours.
Shake the vegetables well to remove as much liquid as you can then transfer the salted vegetables to a bowl.
Although not required, the veggies could be rinsed to remove the salt, but make sure they are then shaken to remove excess water.
To the vegetables, add the turmeric, sugar, vinegar, oil and lemon juice and toss again to combine the flavours.
Cover the bowl with cling-film and chill in the fridge for at least an hour before serving. Or leave longer if you wish. This does not store well for any length of time, so best to make only the amount you need.


This next chutney will keep well for at least 6 months, and a good way to use up windfall (or foraged) apples. The recipe states it eat extremely well with cheese and soda bread. Use only a little cayenne pepper if you prefer a mild chutney, use more if you wish it to be spicier.
The weight of the apples is before preparation.
Apple and Sultana Chutney: makes 2 lb (900g)
12 oz (350g) cooking apples, to be peeled, cored and chopped.
4 oz (100g) sultanas
2 oz (50g) onion
1 oz (25g) blanched almonds
1 tsp peppercorns
half tsp coriander seeds
6 oz (175g) sugar
2 tsp salt
1 tsp ground ginger
15 fl oz (450ml) cider vinegar (or white wine vinegar)
quarter teaspoon (or to taste) cayenne pepper
red chillies (optional) to add at end.
Prepares the apples, and chop the sultanas, onions and almonds and set aside.
Put the peppercorns and coriander seeds into a square of muslin, tie up with string (leave a long bit of string to hang over the edge or tie to the pan handle for easy removal), and put the sugar, salt, ground ginger and vinegar into the van with cayenne to taste. Heat gently, stirring until the sugar has dissolved, then add the prepared fruit, onion and nuts. Bring to the boil and simmer for up to 2 hours or until the liquid has evaporated.
Spoon into hot, sterilized jars, placing a whole chilli on top of each jar (opt). Leave to get completely cold before covering, sealing and labelling. Store in a cool, dry place. Best left for a month to mature before eating, and correctly stored will keep for at least six months.


Final recipe today is for a pear chutney, and a useful way to use the 'fallings' as the pears need to be hard. Good to eat not just with cheese and oatmeal biscuits, but also makes a good accompaniment to grains such as 'tabbouleh' and 'pilaff', and 'couscous' .
As with the above recipe, leave for a month to mature before eating, and it will store for up to one year. One well worth making to add to that Christmas Hamper you are planning to give as a gift.
Pear and Walnut Chutney: makes 4 lb (1.8kg)
2.5lb (1.2kg) firm pears
8 oz (225g) tart apples (Granny Smith etc)
8 oz (225g) onions
6 oz (175g) sultanas
zest and juice of 1 orange
4 oz (100g) walnuts, roughly chopped
15fl oz (450ml) cider vinegar
14 oz (400g) sugar
half tsp ground cinnamon
Peel and core the pears, then cut into 1" (2.5cm) chunks. Peel and chop the onions into the same size, then place both into a preserving pan with the vinegar. Bring to the boil, then reduce the heat and simmer for 40 minutes until tender, stirring from time to time. Meanwhile put the orange juice and sultanas into a bowl and leave to soak.
When the pears/onions are tender, add the OJ, sultanas and the sugar to the pan, heating gently until the sugar has dissolved, then simmer for a further half hour (maybe longer) or until the chutney is thick and no excess liquid has remained - always remembering to stir often.
Toast the chopped walnuts in a dry frying pan for 5 minutes, then stir into the chutney with the cinnamon, then spoon into hot, sterilized jars, cover and seal. Store in a cool, dry place for a month before using, and use within a year.


Saturday, August 28, 2010

Take a Good(e) Look

This photo shows
the 'harvest' gleaned
yesterday. Not a lot, but
each day there is more
and these eke out food
bought, so money saved.
The apple was a falling.
The courgettes,
raspberries and toms
were picked when
wandering round the
garden.


Most of the above have the same amount that can be picked every two or three days, so a regular (but seasonal) supply at the moment. Some of the tomatoes were still green as a truss broke from the vine, but will ripen as long as kept with the red. By the way - ate six red ripe tomatoes BEFORE taking the photo, so visualise more. Have to say though, they were not as sweet as expected, possibly the wrong variety, but being a 'tumbler' tomato, there seem to he loads more still on the bush waiting to ripen. All we need is the sun.

Wednesday, August 25, 2010

Making Things Work...

You may remember the banana bread/cake recipe given (from the Quaker Oats booklet). Decided to make it after all (I know I said I would, but then you know how often I change my mind!).
This turned out to be very economical in that it did make use of the over-ripe bananas that I had kept in the fridge - the flesh had turned a murky brown colour, but on sampling a slice, found it still edible and exceptionally sweet (the riper the banana the sweeter it gets).

Here you see the ingredients .
Moving clockwise from the
top is a bowl of flour, then a
tiny amount of milk in a very
large jug, a jug with some
golden syrup, an egg, marg
sitting on the sugar, then the
ripe bananas, a tub of bicarb
and jar of mixed spice.


The margarine used was Stork,
and the only difference to the
recipe given yesterday was
that I used two tsp. of mixed
spice instead of one (as that
was all that was left in the jar)
and it was ancient anyway so
had probably lost its strength.
Here you see the finished cake.


Once cut, the texture was cake,
certainly not 'bread', and this
ate well either alone or spread
with butter.
Both B and I loved it, this is why
only half of it was left before I
managed to get a chance to take
a photo.


Here's a good tip: when wishing to butter fresh bread or slices of crumbly cake, always spread with butter BEFORE slicing, and the bread/cake is then far less likely to fall apart when cutting thin slices.

Not sure whether the cake was dark in colour because of the syrup, the extra spice, or the bananas having darker flesh, but had no problem with this. Again, this is another recipe that can be adapted, as it had the taste of a fruit cake without the fruit, so dried fruit could be folded into the batter before baking. Or maybe ground ginger used instead of mixed spice, and if black treacle is used instead of golden syrup this would darken the cake more and turn it into a very credible 'gingerbread'.
Wrapped in foil and kept for a couple of days before eating, because of the syrup, the cake may become 'stickier', and so even more scrumptious.

Considering the amount of bananas used, there was not that much banana flavour in the cake, but these did seem to work as a substitute for eggs as the cake was far lighter in texture than expected. After sampling the first slice, Beloved said it was lovely - "with a hint of ice-cream flavour". Not quite sure what he meant by that, but as he loves ice-cream doubt that was meant to be a criticism.
All I can say is - we need never throw over-ripe bananas away when there is a recipe as easy to make and so very economical as this Banana Cake.

http://www.moneymakingexpert.com/ will send a monthly (or is it bi-weekly?) list of current ways to save money and special offers. Sometimes 'freebies' can be sent for. Always worth signing up for this even if not a registered user of their site.

Tuesday, August 24, 2010

Using up Oddments - Part 2

Yesterday's blog showed a gathering of oddments from the fridge/freezer/larder that together made a very creditable supper dish, chicken stock, and plenty of leftovers. Today we continue using the 'leftovers' to turn into yet another good meal. Explanation more by way of pictures than anything else.

First we start with a photo of
the Value pack of mushrooms
bought recently. The weight
is 750g and costs £1.79p.
Half the mushrooms were
large, the remaining ones half
the size, and allowing that one
large = 2 small, these are equal
to 36 'smaller' ones.

The reason for showing the mushrooms before the meal 'prep' is that it is far easier for me to cost each mushroom 'individually' (or carrot, tomato, onion, shallot....) rather than by weight. Luckily, yesterday the mushroom were two sizes only, one large = two small, and (as said above) equivalent to 36 'small' mushrooms in the box which then worked out at 5p each (or 10p each for the larger mushrooms if you wish me to be more exact). As mushrooms were included in yesterday's supper dish (along with a few other ingredients other than the leftovers), this helped me to keep the cost down to no more than 25p for mushrooms used.

In the next picture you see the
ingredients to make a 'not quite'
chicken fricassee.
From the left - chicken stock,
5 small mushrooms, twoheaped
tsp of creme fraiche, a bowl of
cooked veg, chicken scraps,
a small bowl of rice, and two
shallots.

When correctly made, Chicken Fricassee would be made by first frying some onions in butter, and then adding sliced mushrooms. Floured strips of raw chicken breast are then fried to golden, some chicken stock and white wine added, simmered down, then sour cream stirred in. This is then served with rice.

My version was as near to this as I could get using up the leftovers from the preceding day. As the meal was just intended for Beloved (at that time did not expect any surplus), the amounts of 'freshly added' were minimal. Two shallots, 25p worth of mushrooms, creme fraiche, rice - none being 'leftovers', but neither were these costly.
The chicken stock, chicken scraps, cooked vegetables were leftovers from the preceding day so by my way of reckoning - absolutely 'free'.

One extra 'additive' not shown was some (free) white wine - this came from an empty box of wine that I found on the 'discard pile. I knew (B thought he had tapped every last drop out) there would still be some dregs left that could not run through the tap, so cut off one corner of the inside foil container and through that poured out - guess what - a glass and a half of Chardonnay. B had the glassful, the half went into the fricassee. If I hadn't discovered the empty box, this 'free' wine would have ended up in the bin.

The shallots were peeled, and thinly sliced, fried in a little butter for a few minutes. Mushrooms also sliced and added to the pan and cooked for 2 minutes. The stock was then poured in and left to simmer down, the wine then added together with the cooked chicken scraps and heated through. When the liquid had reduced down, stirred in the creme fraiche. Unfortunately the 'sauce' ended up thinner than I wished for, so slaked half a teaspoon of cornflour in a little water, adding it to the pan where it thickened perfectly to make the 'sauce'.

Meanwhile I had been cooking the rice on the hob, and heating the vegetables in the microwave. And because I needed to work at speed so the food stayed hot the next couple of photos do not show the meal presented well or looking as good as it really was (due to me still not getting the lighting right when I take the photos) , and - after realising there was enough food for both Beloved and myself - decided to do a more elaborate presentation for B's meal, putting hot cooked rice into one greased ramekin dish, the vegetables in another, before turning each out onto a large oval plate, and spooning the 'fricasse' round.

Although the plate looks round
it is oval, and what is called a
' meat platter'. Above this can
be seen part of the smaller
dish on which my meal
was served.
The meal really did look more
appetising than this.


The final picture shows my
plateful - this in itself a good
portion, proving that it is
always worth using up every
scrap rather than throwing
away food that appears to be
past its best, or might normally
be thrown away.


Even the serving plates in the above photos were 'free'. The large meat plate given to us, and the blue edged shallow dish (soup plate?) Beloved found on the sea bed when diving some decades ago. If you look carefully you can see on the blue rim close to the spoon some faint white 'sqiggles'. These are calcified 'remains' left by sea creatures that had once attached themselves to the plate and made it their home. These 'ridgy bits' are so tighly 'fossilised' onto the plate that they are impossible to remove/chip away, even after countless washings. So they remain.
We have other plates that B also found on the sea bed - possibly being thrown out from a ferry by mistake along with the food scraps. Would like to boast they came from the Titanic, but as they were found in the Sound of Mull - hardly think so.

With half the cooked vegetables still not used, seems like minestrone soup will be my lunch for today, and then will start all over again - seeing what other 'leftovers' can be put to good use. In the fridge do have four small bananas - skins now gone black - that will be made into some sort of cake/pudding today.
Normally bananas should not be put in the fridge, but when my daughter came to stay recently she put four she brought with her in the fridge and they appeared to stay perfect until she took them with her when she left. So I tried it with four not-quite-ripe bananas, and for me - it didn't work. But to be fair, they have been in the fridge a lot longer than my daughter's.

Some time back gave a list of foods that can be substitute for egg when making a cake. Banana being one of them, and yesterday thought I might have a go at making a banana bread/cake using less eggs than normal. The Quaker booklet does give a recipe of this type,, so will have a go at making this today. Here is the recipe if you too feel so inclined.

Banana Bread:
3 oz (75g) margarine
4 oz (100g) caster sugar
3 bananas
1 egg, beaten
4 oz (100ml) golden syrup
12 oz (350g) flour
1 level tsp mixed spice
2 level tsp bicarbonate of soda
4 oz (100g) one-minute Quaker Oats
quarter pint (5fl.oz/150ml) milk
Cream together the margarine and sugar. Slice (or mash) bananas, and add to the creamed mixture together with the egg and syrup. Beat for a few seconds.
Sieve together the flour, spice and bicarb, and the stir in the oats. Fold this into the creamed ingredients together with the milk.
This mixture above can either be baked in one 2 lb (1kg) loaf tin or 2 x 1lb (500kg) loaf tins, but will require different cooking times (as given below).
For the larger sized tin bake at 170C, 425F, gas 3 for one and a half - one and threequarter hours.
For the smaller size tin bake at 190c, 375F, gas 5 for 40 - 50 minutes.


Monday, August 23, 2010

Making The Best of It..

Yesterday, decided to raid the fridge/freezer and use up oddments that had been 'lurking' there and could do with using up.
As B had worked his way through the chicken soup over the last couple of days, felt that more chicken stock should be made, so thawed the chicken wings frozen away each time I jointed a whole chicken. Decided at this point to take photos as I worked through the day in the hope these will show how much can be made from 'not a lot' - Shirley style.

Here you see the pic
of the chicken wings
Plump enough to give
some cooked meat
once the stock had been
made. Chicken wings
alone make a very
well flavoured stock
when cooked along
with the usual veg.

As the chicken thawed,
went into the fridge to
get some carrots and
discovered some 'old
stock' beneath other
veg in the veg drawer.
For interest's sake took
a look at the 'use by
date' on the bag.
It read 28th March!!!


The carrots seemed as good as if bought recently, so decided to use them, first trimming, then chopping them into chunks, leaving three whole to use for stock. Weighed them (more for your interest than mine - and they weighed just 2 lb). Behind the scales, can be seen two large onions and three ribs of celery in a bowl, all to be used to make chicken stock AND the evening meal (as it turned out - other things as well).

The whole carrots were cut in half and put in a pan with the top and bottom parts of the celery ribs (aka 'trimmings'), half an onion (cut into wedges) and the first layer of white flesh from the onions once the brown papery skin had been discarded (if leaving the brown skin on, this would have made the stock much darker in colour - useful when making beef stock, but not chicken). A few fresh bay leaves were also added, and the contents of the pan covered with two pints of cold water, brought to the boil, then the heat turned down so the liquid barely 'burped'. Needed to use a heat diffuser under the pan to achieve this effect. The gentler the simmering, the clearer the end result.
After a few hours, the
stock was ready.
In this pic you see a
dish of the chicken
flesh picked from the
bones, a dish of the
cooked stock veg.,
and two jugs of the
stock. For a clearer
stock would need to
strain it further.

While steaming traps flavour into vegetables, simmering releases this into the cooking liquid - and this was apparent when tasting the cooked vegetables ( seen above). Although they still look 'servable' as a vegetable, they had no flavour left in them at all, because this had gone into cooking liquid (aka stock and which makes it taste so good). The veggies still contain fibre, so if blitzed up with some of the stock, adding seasoning to taste, this sort of puts everything back together again, and thus will make an excellent soup.

While the stock was cooking, then turned my attention to the remaining carrots. My intention was to dice these, along with most of the onion and celery, and use at least some of it to add to about 5 oz (150g) minced beef that had also been thawed (but not shown).

Decided to use the food processor to chop the carrots - and this is something I had never attempted to do before, always dicing them by hand. Have grated carrots in the processor but for some reason it never occurred to me using the processor would be a much quicker way to 'chop', especially when vegetables are not needing to be neatly diced. After having this 'gadget' 20 or so years you would have thought by now I'd have tried using it to 'chop' carrots. But it hadn't.. Until yesterday.
This worked like a charm, a few carrots at a time 'pulsed' so they didn't end up as a puree. The celery and onions were diced by hand, then mixed with the prepared carrots, put into a pan with some butter and sweated off for a few minutes.

My intention was to use the veg to make a spag.bol type meat sauce, so added a can of chopped tomatoes to the veggies, (rinsing out the can with water to get every last little bit out),plus the last dregs of HP sauce in the bottle (again rinsed out), and several shakes from the Worcestershire sauce bottle. To add extra beef flavour, crumbled in an OXO cube. Realised by then there were too many carrots in proportion to everything else, but too late to do anything about it.

This pan of veggies plus was simmered until just tender, meanwhile frying the minced beef in a separate pan. Only some of these veggies were added to the meat as Beloved had chosen Chilli con Carne for supper (not spag bol after all), and as red beans would also be part of the dish, the balance of meat, veggies, beans was important.. This left me with a lot of cooked carrot mixed with a smaller amount of onion and celery.


Here you can see the
large bowl the veg
left AFTER some had
been removed and
added to the chilli.
The interesting thing
about this mixture is
the excellent flavour
it has due to the HP,
W.sauces, the OXO
and the tomatoes.

After tasting the above cooked veg, it took all my willpower not to keep on eating because it really did was packed with flavour - in other words, absolutely gorgeous, and will probably turn this now well flavoured cooked veg into yet another soup (possibly the base for minestrone), or add red beans, heat through and make a vegetarian 'chilli'. There is enough to do both.

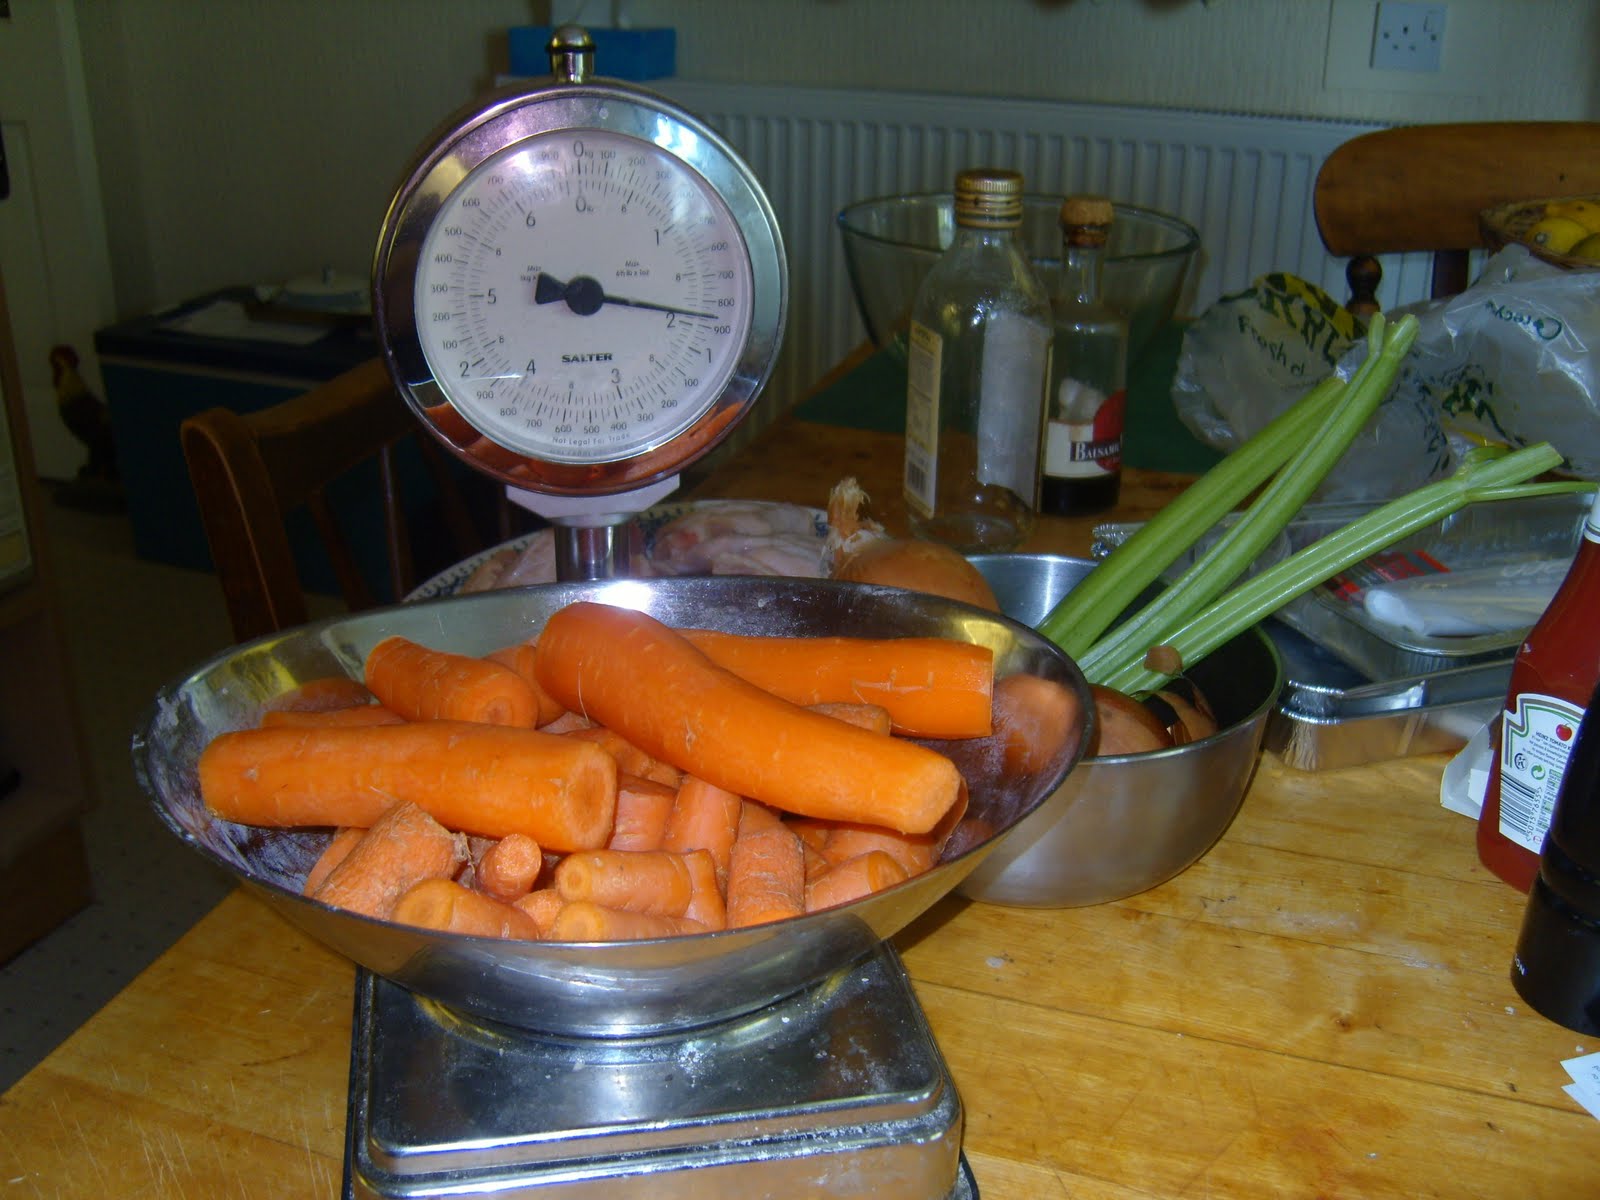
This final pic shows
how a small amount
of minced beef, plus
some of the above
veggie mix, together
with a chilli mix, a
can of red beans and
some water can turn
into a three-portion
chilli con carne.
The chilli was much
darker in colour than
it appears.

So, there you have it. A step by step account of yesterday's Goode cooking, and hope it explains how chicken winglets (that many people throw away), very old carrots, three ribs of celery, two large onions together with a few ounces of minced beef, a can of chopped tomatoes (bought when on offer), a very cheap can of red kidney beans, and a packet of chilli con carne mix (half price) together not only made a good supper, but also provided enough chicken flesh to make something worth eating, stock vegetables to turn into soup, plus a big bowl of cooked veggies (alone this having great potential to make at least a couple more dishes), and - best of all - one and a half pints of really good chicken stock.

Other than the chilli mix, the beef (this also reduced in price), and the onions, the rest was just 'using up' what others might have thrown away.
In the Goode Kitchen every can is rinsed out and this liquid then added to whatever is made, every sauce bottle has the same treatment. Every food bought is almost always only when reduced in price or when on offer, and believe yesterday only the onions were bought at full price. The celery was 'reduced', the old carrots originally a Value pack so cheap enough anyway. The chicken wings - being taken from a whole chicken - worked out much cheaper than if bought separately (as are all chicken portions when the whole bird is jointed up at home).

Although many people probably do make their own chicken stock from wings or a carcase, maybe not all bother to pick the bones after cooking to remove any remaining flesh. As you can see from the wings, there can be a considerable amount, all of this able to be used in one dish or another.
Both Beloved and our daughter (who happened to call in while I was preparing supper) said that the chicken would make a good 'fricassee'. Have to look that dish up, for cannot remember having made this before (but as they both remembered eating it, must have done). Maybe that will be tonight's supper. If so you can look forward to photos of this being shown tomorrow.


Friday, August 20, 2010

Something To Look Forward To.

Here is a recipe for 'marmalade' pudding. Instead of using the grated rind and juice of one orange and using ANOTHER orange (as per ingredient list) grate zest from the second orange before peeling, and use orange essence and water to make the 'juice'. You may already have a carton of orange juice in the fridge for drinking. A good tip is to freeze the last juice still in the carton (it often contains segments) as - once opened - it does not have a long shelf life, and once frozen the top of the carton can be cut away and the block of orange juice 'decanted' into a freezer bag. The glace cherries and angelica are both for flavour and colour, so chopped n0-soak apricots could be used along with other dried fruits if you prefer.
In any case, as the marmalade and oranges 'coat' the cake rather than incorporated into the mixture, see no reason why this idea should not work with other 'cakey mixtures' such as Victoria Sandwich.
Light Orange Pudding:
4 oz (100g) glace cherries, finely chopped
1 oz (25g) angelica, finely chopped
4 oz (100g) butter
4 oz (100g) caster sugar
grated rind and juice of 1 orange
2 eggs
3 oz (75g) self-raising flow
2 oz (50g) fresh white breadcrumbs
3 tblsp lemon or orange marmalade (pref shredless)
1 orange, peeled and thinly sliced
Cream the butter and sugar together until light and fluffy, then fold in the orange zest. Gradually beat in the eggs, and then fold in the flour and breadcrumbs. Stir in the orange juice and the chopped cherries and angelica.
Coat the base and sides of a 2lb loaf tin with the marmalade and cover with overlapping slices of orange. Spoon the pudding batter into the tin. Stand this in a roasting tin half-full of water (bain marie) and bake at 200C, 4o0F, gas 6 for 45 minutes. Turn out onto a plate and serve with custard or whipped cream.

Thursday, August 19, 2010

Always Something...

Many readers make their bread from scratch, so if you wish to try the following recipe for a 'lunch loaf', whether you prefer to use a ready mix, or use your own it's up to you.
Wholemeal Cheese Crown Loaf:
1 x 280g (11oz) packet of wholemeal bread mix
5 oz (150g) Stilton (or other blue cheese) crumbled
1 tblsp chopped fresh herbs
7 fl oz (200ml) hand-hot water
Put the bread mix into a bowl with half the cheese and all the herb. Stir in the water and mix to form a dough. Turn onto a lightly floured board and knead until smooth and elastic - this will take about 5 minutes.
Divide dough into 8 equal sized portions and shape each into a roll. Arrange seven of these 'balls' around the outer side of a greased 8" (20cm) sandwich tin, placing the last in the centre.
Press your thumb into the centre of each ball to make hollows, and fill these with the remaining cheese. Cover and leave to prove in a warm place until doubled in bulk - this takes about 40 minutes.
Bake at 230C, 450G, gas 8 for about 40 minutes. Best served warm. Especially good served with soup.

Wednesday, August 18, 2010

'Let Them Eat Cake...!'

Let us move onto more interesting things - like delectable eats. Often these can be expensive, but have managed to discover a recipe made during the last century (doesn't that sound a long time ago, but could be no more than 12 years ) which worked then and see no reason why it shouldn't now. As it uses what I call 'oddments' from the larder, plus a few extras, then little cause for concern re the cost. See what you think...

Although made with canned pineapple, other fruit could be used, and because the recipe as given serves 1o many, this should be a true party piece. For family eating, make half the amount. There appears to be a lot of ingredients, and quite a lengthy method, but once reading through you will realise it really is very simple to prepare and assemble. Also no actual 'baking' needed.
Chocolate Crunch Gateau: serves 10
1 can pineapple rings
10 oz (275g) plain chocolate
2 oz (50g) unsalted butter
1 tblsp hot water
half packet of sponge fingers
4 oz (100g) candied peel
4 oz (100g) glace cherries, chopped
juice of 1 lemon
12 oz (350g) granulated sugar
half pint (300ml) double cream
2 oz (50g) icing sugar, sifted
2 oz (50g) curd cheese
2 tblsp natural yogurt
(glace cherries and toasted flaked almonds to decorate)
Oil the sides of two 8" (20cm) sandwich tins and line the base with greaseproof paper.
Put the chocolate into a bowl and place over a pan of simmering water until melted, then add the butter and hot water. Break up the sponge fingers into small pieces and add these to the chocolate, together with the candied peel and chopped glace cherries. Spoon this mixture over the base of each tin then chill in the fridge until set.
Drain the canned pineapple, and put the juice into a pan - making it up to half a pint (300ml) with water. then bring to the boil and add the lemon juice and sugar. Simmer until the sugar has dissolved then raise the heat and boil for 5 minutes before adding the pineapple rings. Boil for 3 minutes longer or until the pineapple looks translucent and the sugar syrup has thickened.
Remove the pineapple to a sheet of greaseproof paper and allow to cool. Leave the syrup in the pan.
To assemble the gateau, turn out the chocolate discs from their tins, and peel off the paper. Put the first disc smooth side down, onto a serving plate. Whisk the cream until thick but still soft, then stir in the icing sugar. Whisk in the curd cheese and yogurt until smooth and even thicker. Spread two-thirds of this onto the chocolate disc, then top with the second disc.
Spread the remaining cream on the second disc, and arrange the pineapple (overlapping if necessary) on top. As an added extra add a few glaces cherries and sprinkle over toasted flaked almonds.
When ready to serve, spoon the reserved syrup on top of the gateau.

This next recipe for Christmas Pud uses no sugar and no flour - so this could prove cost-cutting, even though it is fairly high on the dried fruits. However it will make one large (2lb/1kg) pudding plus one half that size, or could make 3 x 1lb (500g) puds, so depending upon how many you will be feeding - make only as much (or little) as you need.
Unlike the richer puds of this type, this one has a shorter shelf-life, but even so will keep well for 2 - 3 months after making, so it is coming up to the time when we could be planning to make this pud. Instead of buying the dried fruits separately, see no reason why 'mixed dried fruits - with candied peel - could not be used instead. Replace a couple ounces of this mixed assortment with the same weight of candied peel and it should end up much the same.

Not so Heavy Christmas Pudding:
3 oz (75g) glace cherries, roughly chopped
6 oz (175g) candied peel
12 oz (350g) raisins
6 oz (175g) sultanas
6 oz (175g) currants
3 oz (75g) flaked almonds
8 oz (225g) fresh white breadcrumbs
8 oz (225g) shredded suet
1 tsp ground cinnamon
quarter tsp freshly grated nutmeg
6 eggs
3 tblsp brandy, rum or whisky
half pint (300ml) Guinness or similar stout
Put the cherries, peel and dried fruits into a big bowl with the nuts, breadcrumbs, suet and spices. Mix together thoroughly.
Whisk the eggs until frothy and thickened and then stir these into the dry ingredients, followed by the chosen spirit and enough stout to make a mixture that just drops from the spoon.
Divide this into very well buttered pudding basins ( one large 2 pint, plus a smaller 1 pint OR 3 x 1 pint) and smooth the surface. Cover each with a double layer of well buttered foil (if the basins are nearly full make a pleat in the middle to allow for expansion) and tie tightly with string (it helps to make a string handle for ease of lifting from the pan).
Put the basins - preferably on a rack or inverted saucer in large saucepans, and pour in boiling water to come 3/4 of the way up the sides of the basins. Cover and steam for 6 hours for the 2lb size, or 4 - 5 hours for the 1lb size. After two hours check to see if the water needs topping up.
When cooked, remove from pan and leave to get cold, then store in a cool dark place for up to 3 months. On Christmas Day replace the foil with fresh clean layers and steam for another hour or so before serving with brandy sauce, brandy butter (or rum butter) or whipped cream.


Friday, August 13, 2010

'Tis the Season...

here is useful herby info:

When wishing to dry fresh herbs, tie them loosely in a bundle and hang them in a cool, dry place, for several weeks. When the leaves are completely dried, strip them from the stems and store in an airtight container. Or - if you have the room - leave the dried bundle of herbs intact, and put them into a paper bag, and close the top. Keep this in a dry place, and then remove the leaves as needed. This seems method seems to keep in the flavour.

Two quicker ways to preserve herbs is either in the microwave or in the freezer. To microwave, place 3 or 4 sprigs at a time between two sheets of kitchen paper, and microwave on high for 1 - 3 minutes, until the leaves are brittle, then store leaves loosely in an airtight jar.

To freeze herbs, rinse and then pat dry with kitchen paper. Strip the leaves from the stems and put them into heavy-duty freezer bags. Press out at much air as possible, seal the bag and then freeze. Use as required.

Now a few details of some herbs that we normally use when cooking:
Basil:
This does not dry or freeze particularly well, but fresh leaves can be stuffed into a jam jar - then light olive oil poured over (shake the jar to get rid of air bubbles) then seal and store at room temperature for several days. The oil will become infused by the basil flavour (useful when making pizzas, or dishes containing tomatoes, and a leaf or to can be taken from the jar to add to a dish.

Bay leaves:
Being an evergreen, the leaves can be picked throughout the year, although they do dry well (some chefs prefer using dried basil to fresh as the flavour is more pronounced), and they also freeze well. Just put the leaves into a plastic bag or container to freeze. Every bay leaf taken from the freezer is virtually the same as if just freshly picked.

Chives:
The smallest of the onion family, they grow in grassy clumps. Chives should always be used fresh as dried ones are virtually tasteless. Hardly worth freezing as during the colder months onions take their place.

Coriander:
You either like it or loathe it. Coriander leaves should always be used fresh, and added at the end of cooking so that their flavour can be fully appreciated. Coriander stems and (cleaned) roots also have good flavour so can be added to a dish to give flavour (remove before serving).

Dill:
A feathery-leaved plant that goes wonderfully well with cucumber and fish. Like coriander, should be added to the end of the cooking time to preserve its delicate flavour. Both dill seeds and dill leaves can be steeped in wine, cider or white wine vinegar to make a 'herb vinegar'.

Marjoram:
Sometimes called sweet marjoram, this is very similar in flavour to oregano. Best used fresh, but can also be dried as an ingredient for salad dressings.

Mint:
So many varieties, but the most common is spearmint. Dies down in winter, and not worth drying, but can be preserved as mint jelly, or mint sauce.

Oregano:
Similar to marjoram (see above) and the flavour of its leaves intensifies after drying.

Parsley: curly and flat-leaf
The flat-leaf has a more distinctive flavour than the curly. With any luck, parsley should keep growing through the winter, although may need so protection. Sow a fresh batch every year. Not worth drying.

Rosemary:
An 'evergreen', so fresh rosemary can be picked throughout the winter. However, drying this herb does not impair the flavour, and so worth begging a few sprigs if you don't grow your own.

Sage:
Like thyme, and rosemary, one of the stronger flavoured herbs that needs using only in small amounts. Perhaps the only herb that improves with drying as this imparts an added musky flavour.

Tarragon:
Best used fresh. A tarragon flavoured vinegar can be made by steeping whole sprigs of this herb in a bottle of vinegar. It will keep for weeks, just add more vinegar as it gets used up.

Thyme:
An essential herb for any kitchen as used in fresh (or dried) bouquet garni, salad dressings, and flavoured vinegars. Thyme leaves dry very well and lose little of their flavour.

As to using herbs (fresh or dried), as these can impart a subtle or stronger flavour (according to your wishes) to anything savoury, it is always worth using them as often as possible. Try adding a few dried mixed herbs to flour when making pastry, or to flour and suet when making dumplings.

Fresh herbs roasted with the meat (particularly rosemary) just crumble when eaten and taste really good. Parsley can be fried in hot oil until crisp and this adds a different texture to a dish - almost like the fried 'seaweed' we get served with Chinese food. Sage leaves are also wonderful when quickly fried until crisp, and we should try to incorporate herbs in various ways in the dishes we serve.


Thursday, August 12, 2010

More Than One Way...

Coleslaw is nearly always made with the hard white cabbage that is one of the cheaper vegetables with a good shelf life in the fridge.
Cheese Coleslaw:
1 tblsp natural yogurt
pinch each salt, pepper and sugar
a little vinegar
2 oz (50g) finely shredded white cabbage
1 small red eating apple
2 tsp lemon juice
1 tblsp grated onion
2 oz (50g) grated or diced Edam or other hard cheese
Prepare the dressing by mixing together the yogurt, seasoning, sugar and vinegar. Leaving the peel on the apple, core, dice and put into a bowl with the lemon juice. Toss to coat the apple with the juice (this prevents the apple flesh browning). Then add the onion, cabbage and cheese. Pour over the dressing and toss the lot together. Good eaten with a garnish of watercress.

This next coleslaw uses a curry-flavoured mayo, and to make this I would blend some mild curry paste into mayonnaise to taste, or possibly some of that cheapo (4p) canned curry sauce could be blended with a little yogurt (or mayo). If not all - or none - of the larger dried fruits are to hand, substitute sultanas.
Spicy Coleslaw:
1 lb (450g) white cabbage, finely shredded
1 large onion, grated
2 carrots, grated
2 dessert apples, grated
2 oz (50g) walnut pieces, chopped
3 oz (75g) mixed dried fruit (apricots, dates, prunes) chopped
4 - 5 tblsp curry-flavoured mayonnaise
Put all but the mayo into a bowl and mix well together. Pour over the mayo and toss gently to coat. Serve lightly chilled.

And yet another cabbage based coleslaw - well the theme today is 'more than one way'.
Mushroom Slaw:
8 oz (225g) mushrooms, sliced
8 oz (225g) white cabbage, shredded
2 oz (50g) sultanas
5 fl oz (150ml) mayonnaise
2 tblsp lemon juice
2 tblsp Dijon mustard
2 tblsp single cream
2 tblsp finely chopped chives
salt and pepper to taste.
Put the mushrooms, cabbage and sultanas into a bowl and mix well together, then make the dressing by blending together the remaining ingredients. Pour this over the mushroom mixture, and toss gently to mix. Chill in the fridge for 3 - 4 hours before serving.

With the above variations on a theme, there are still many other ways we can alter or improve coleslaw, maybe adding finely chopped celery, red or yellow diced bell peppers, canned (drained) sweetcorn kernels. Perhaps including flaked almonds, peanuts or cashew nuts. Even sunflower/pumpkin seeds.
With a base of shredded cabbage, and a fairly thin mayonnaise to bind (thin it down with water if necessary), we can then add other ingredients according to what we wish to use up. The main thing - apart from any dried fruit used - aim for a 'crunchy' texture.


Wednesday, August 11, 2010

First Fruits and More...


One favourite dessert of ours was Yorkshire Curd Tart. This used to be home-made until curd cheese seemed to disappear from the supermarket shelves. Luckily have discovered an easy method to make 'curds' and so will shortly be making this tart again. Please note that the preparation for the curds need to be done the day before making the Tart.


Not Quite Yorkshire Curd Tart:

2 pints milk

1 tblsp vinegar

1 dessp plain flour

6 oz (175g) sugar

6 oz (175g) currants or raisins

1 egg

grating of nutmeg

8 oz (225g) shortcrust pastry

Heat the milk until not quite boiling (as soon as a skin appears on the surface), the stir in the flour and the vinegar, and keep stirring until it forms curds. Remove from heat and strain the mixture through a muslin-lined sieve, and leave to drip overnight until all the surplus liquid has drained away (this liquid can be used to make cakes, scones etc).

The next day mix the curds with the remaining ingredients (except nutmeg). Roll out the pastry and line a flan case, then pour in the curd mixture, grating nutmeg over the top. Bake at 200C, 400F, gas 6 for approx 25 minutes or until golden brown and firm to the touch.


Mincemeat Crumble:

4 oz (100g) mincemeat

4 fl oz (100ml) water

zest of 1 orange

2 tsp cornflour plus 1 tblsp cold water

1 tblsp rum, brandy, or orange juice

2 tsp sugar

crumble topping:

4 oz (100g) butter

2 oz (50g) demerara sugar

4 oz (100g) porridge oats

whipped cream and chopped walnuts to serve

Put the mincemeat and water into a pan with the orange zest. Stir and bring to the boil, then reduce heat and simmer for 5 minutes. Mix the cornflour with the cold water and the chosen spirit/orange juice. Stir this into the mincemeat, then stir in the sugar. Boil, and stir for 1 minute until the mixture thickens. Remove from heat and leave until quite cold.

To make the topping, melt the butter in a pan and stir in the sugar and oats. Place half in the bottom of a serving dish, cover with the mincemeat mixture, and then spread the remaining crumble over the top.

Serve with whipped cream garnished with chopped walnuts.


Tuesday, August 10, 2010

Living a Dream


Not everyone makes their own bread (although always worth doing), maybe because it can be a lengthy process what with the kneading, rising, knocking back, rising again and so forth. However - the following recipe is a 'quickie'. A savoury form of Irish Soda Bread that is best eaten fresh and still warm from the oven (so perfect with soup). As a time-saver, why not bag up the amount of flour needed, so when in the mood to bake, that all that has to be added are the remaining ingredients.

This 'bagging up of a measured amount of flour' could work for other recipes, for with many dishes it is often the weighing out of this, that and the other, that can sometimes become a little tedious.


Cheese and Herb Soda Bread: serves 4

8 oz (225g) plain white or wholemeal flour (or blend of both)

1 tsp mustard powder

half tsp salt

quarter tsp bicarbonate of soda

quarter tsp cream of tartar

half tsp dried sage (or dried mixed herbs)

4 oz (100g) Cheddar cheese, grated

6 fl oz (175ml) buttermilk or thin natural yogurt

Mix the dry ingredients together, then stir in 3 oz (75g) of the cheese. Add the buttermilk/yogurt and mix to a firm dough. Turn out onto a lightly floured surface and knead lightly, then shape into a round flattish loaf.

Place on a baking tray, and - using a sharp knife - mark into 8 sections. Sprinkle the remaining cheese over the top and bake at 200C, 400F, gas 6 for 30 minutes or until golden and firm to the touch. Best eaten while still warm.


Keeping a supply of grated cheese in the fridge/freezer is always a good idea for there are so many dishes that use this ingredient, and again it can be a tedious job grating the cheese by hand or getting out the processor (and then washing it up afterwards) just for one dish. Gather together all the oddments of cheese and grate the whole lot in one go - then job done.


This next recipe uses few ingredients (compared to some), and although two cheeses are named, no reason why a mixture of grated cheese could not be used instead. Almost certainly the amount of rice might just fit into a standard mug, as will the milk, and the cheeses each into a teacup, so worth checking as it would save getting out the scales in future. Our grandmothers used to cook by this method "a cup of this, a spoonful of that, and a handful of t'other" so no reason why we can't also make the same short cuts.


Cheese Loaf:

6 oz (175g) long-grain rice, cooked

3 oz (75g) Mozzarella cheese, grated

3 oz (75g) Lancashire cheese, grated

1 egg, beaten

8 fl oz (225ml) milk

1 tsp dried mixed herbs

Mix the cooked rice with the rest of the ingredients until well combined. Spoon into a greased 1 lb (450g) loaf tin andbake at 190C, 375F, gas 5 for 15 - 20 minutes or until firm to the touch. Turn out onto a serving plate and serve hot or cold with salad.

An optional garnish (but looks good) is - when ready to serve - decorating the top with overlapping slices of red and green rings of bell peppers.


As grated cheese seems to be the 'ingredient of the day', might as well include yet another dish that makes use of this 'freezer standby'. As this is a soup with dumplings, no real need to serve bread as well. This recipe originated in Scotland and almost a meal in its own right. Another good soup for chilly days.


Cheese Soup with Dumplings:

2 oz (50g) butter

1 onion, finely chopped

1 oz (25g) flour

half tsp dry mustard

1 1/2 pints chicken stock

half pint milk

salt and pepper

grating fresh nutmeg

3 oz (75g) Cheddar cheese, grated

dumplings:

2 oz (50g) porridge oats (quick cook type)

1 oz (25g) shredded beef suet

1 tblsp grated onion

1 tblsp chopped fresh parsley

salt and pepper

1 egg, beaten until fluffy

To make the soup, melt the butter in a large saucepan, then add the onion and fry until softened, but do not brown. Stir in the flour and mustard and cook for 1 minute. Gradually add the stock and milk and keep stirring while bringing to the boil, then stir in nutmeg and seasoning to taste, cover and simmer for 10 minutes.

Meanwhile make the dumplings by putting the oats, onion, and parsley into a bowl, adding seasoning to taste. Add the beaten egg to bind together the ingredients, then divide into 16 pieces and roll each into a ball. Drop the balls into salted boiling water and simmer gently for 10 - 15 minutes. Removed with a slotted spoon and keep warm.

Liquidize the soup in a blender/food processor or with a stick blender (or pass through a sieve) and return to the rinsed out saucepan. Stir in the cheese and reheat (but do not boil). Taste, adjusting seasoning if necessary and serve topped with the dumplings.


Monday, August 09, 2010

Reaping the Dividends

Firstly a 'yolk-free' sponge cake. This can either be baked (as per the recipe) to make a layer cake, or baked in a Swiss Roll tin so that it can then be spread with a filling (could be ice-cream) and rolled up to make a dessert (this would freeze well). Stale cake could be stored in the freezer to use as a base for trifles and other such luxuries.

The original recipe suggested its own filling - a lemon curd using the yolks of eggs that had been saved. The recipe for the 'made in minutes' lemon curd is also given.


Featherlight Cake:

3 oz (75g) self-raising flour

1 oz (25g) cornflour

6 oz (175g) icing sugar

whites of 6 large eggs

half teaspoon salt

three quarters of a teaspoon of cream of tartar

Line two greased 8" (20cm) sandwich tins with discs of greaseproof or parchment paper.

Sift the flour and cornflour together, and then sift this again (to get in as much air as possible). Sift the icing sugar into another bowl.

Into a third (and very clean bowl) put the egg whites and whisk until just frothy, then whisk in the salt and

the cream of tartar, and continue whisking until the whites form peaks.

Using a metal spoon, fold the icing sugar - a little at a time - into the beaten whites, then gently fold in the sifted flours, also a little at a time.

Divide this mixture between the two sandwich tins, and gently level the tops. Bake at 180C, 350F, gas 4 for approx half an hour or until the cakes have risen and firm when lightly touched in the centre. Leave in the tins to cool completely. Loosen the edges with a knife before turning out, and peel away the base papers.

To assemble the cake, spread the curd filling (recipe immediately below the cake recipe ) between the two layers. Spread whipped cream (opt) over the top and sides, and decorate as you wish. Chill in the fridge before serving.


lemon (curd) filling for above cake:

yolks of 5 eggs

3 oz (75g) caster sugar

grated rind and juice of 1 lemon

whipped cream (optional cake covering)

Put the egg yolks into a double boiler (or bowl set over simmering water) Using a wooden spoon, stir in the sugar and lemon zest. Gradually stir in the lemon juice. Keep stirring all the time, and cook until the mixture is thick enough to cover the back of the spoon, then leave to get quite cold before filling the cake.


Now we come to my favourite lemon curd recipe for it is so speedy to make and keeps well for up to six weeks in the fridge. Beloved really likes it, so every couple of months I make a new batch. If possible use unwaxed lemons, if waxed then give a wash under a warm tap to remove the wax (although have to say I don't always bother). Forgot to say this curd is made in a microwave oven.

What is useful about this recipe is that you could use 2 large eggs and 2 egg yolks, or maybe one even larger egg and 3 yolks. Have tried it every which way and it seems to work, although slightly richer when more yolks are used in proportion to whites.


Made in Minutes Lemon Curd:

2 oz (50g) butter

5 oz (150g) caster sugar

zest and juice of 2 lemons

3 eggs plus 1 egg yolk

Put the butter, sugar, and lemon zest and juice into a bowl, and microwave on High for 1 minute to dissolve. Stir well, then beat in the whole eggs and yolk/s. Return to the microwave and cook on High for another minute, then remove and stir. Repeat for 3 - 4 times more, stirring after each minute, until the mixture has thickened. Then pot up into several small, hot sterilized jars and seal. Cool and keep in the fridge for up to six weeks. Once the jar has been opened, best to use it up within a week.


Took a photo yesterday of a painting I did of Beloved behind the wheel in a boat, sailing on the high seas. But it has turned out all hazy, don't know why. Must get it down from the wall and lay it on the floor and see if that gives a sharper picture. Only then will you get to see it.


This has reminded me to thank Les for the battery details, although having tried using re-chargable batteries, they don't seem to last long either, although as time goes by it would obviously work out cheaper. Think we already have some of these batteries (and charger), but will have to wait for B's return to find out where they are.

Sunday, August 08, 2010

From Rags to Riches?


Now to cakes made without using eggs. When looking up the recipes (below) posted in the early months of this blog also found a list of ingredients that can take the place of eggs when making a cake. Am giving these first as they help to explain why the following recipes work so well.


Egg substitutes:

1 small banana, mashed OR

1 tsp. baking powder with 1 tsp each water and vinegar OR

1 tblsp apricot puree (as in baby food) OR

1 tblsp apple sauce OR

1 tblsp golden syrup OR

1 1/2 tblsp each oil and water with 1 tsp baking powder


All the cake recipes below use dried mixed fruits (with peel), and as yet have not found a plain eggless cake recipe, although some are sure to be found on the Internet.


Irish Fruit Cake:

10 fl oz (275ml) strained tea (no milk or sugar)

8 oz (225g) mixed dried fruit

4 oz (100g) margarine

4 oz (100g) caster sugar

1 tblsp golden syrup

9 oz (250g) self raising flour

1 tsp baking powder

1 tsp mixed spice

Put the tea in a pan with the dried fruit, margarine, sugar and syrup, and heat until the sugar and fat has dissolved, then simmer for 5 minutes. Remove from heat and allow to cool.

Sift together the flour, baking powder and spice, then make a well in the centre and pour in the tea mixture. Stir well to combine, then pour into a greased and lined 8" (20cm) cake tin and bake at 180C, 350F, gas 4 for one and a half hours - but tent with foil (shiny side up) after the first half hour to prevent it browning too much. Cool in tin for a few minutes before turning out onto a cake airer.

An optional extra is to sprinkle demerara sugar over the top of the cake before baking.


This next eggless cake is similar to the above but uses yogurt as an ingredient and made slightly differently.

Spicy Yogurt Cake:

8 oz (225g) self raising flour

1 tsp bicarbonate of soda

4 oz (100g) soft margarine

4 oz (100g) caster sugar

4 oz (100g) mixed dried fruit

half tsp mixed spice

5 fl oz (150ml) natural yogurt

Sift together the flour and bicarb, then rub in the margarine until like breadcrumbs. Stir in the sugar and dried fruits. Warm the yogurt, stirring in the mixed spice, then stir this into the dry mix. Fold together then pour into a greased loaf tin. Bake at 180C, 350F, gas 4 for 1 hour. Tent with foil if browning too quickly.


Final eggless cake recipe comes from America, so the measurements are in 'cups'. Not a problem if we remember that 1 cup = 8 fl.oz. As always, recipe using cups, measure by volume not by weight. Myself use a glass measuring jug instead of a cup, although do have a set of plastic 'cup' measuring spoons.


Made in a similar way to muffins (dry ingredients mixed together in one bowl, wet in another) the two mixes could be made the evening before, but kept separate and then assembled just before baking. Either bake in one tin, or instead bake smaller cakes/muffins.

No Egg Orange Cake:

1 cup plain flour (8 fl oz)

2/3rds cup sugar (just under 6 fl oz)

quarter cup (2 fl oz) cocoa

three quarters of a teaspoon bicarb. soda

1 tsp grated zest of an orange

pinch salt

half cup semi-skimmed milk (4 fl oz)

half cup orange juice (4 fl oz)

1/3rd cup sunflower oil (just under 3 fl oz)

Mix together the dry ingredients (flour, sugar, cocoa, bicarb, orange zest and salt. Then into a jug put the wet ingredients (milk, orange juice and oil). Pour the wet into the dry and mix well together. Pour into a greased shallow square 8" x 8" (20 x 20 cm) baking tin, or 2/3rds fill 12 muffin cases.

Bake at 180C, 350F, gas 4 for 30 - 35 minutes for the larger cake, and slightly less time if cooking as muffins. Cool on a wire rack and sprinkle over icing sugar when cold.


Tuesday, August 03, 2010

One of the 'puds' in fashion at the moment is Pannacotta. Easy enough to make as it is just single cream sweetened with sugar, flavoured with a split vanilla pod, brought to the simmer and then soaked gelatine leaves stirred in to melt and thicken the cream as it sets.

Yesterday, decided to have a go at a Shirley version (in other words cheating and less work) because I had a quarter of a pint of double cream that needed using up.
Well, I thought, packet jelly is just coloured and flavoured gelatine, so why not use that instead of faffing about with leaf gelatine and using expensive vanilla pods. So chose an orange jelly as the only other in stock was lime and didn't fancy that (sure I have some strawberry somewhere). Put this in a jug, covered it with water to the quarter pint level, then put it in the microwave for just over a minute to melt. After stirring, left it to cool while I watched 'Upstairs, Downstairs'. When cold, stirred in chilled double cream then stirred in cold water to fill the jug right to the top (so making more than a pint). It was already beginning to thicken, so immediately filled three good sized moulds and put these in the fridge to chill.
Once set, after dipping one mould in water, it turned out easily enough and you can see the result in the photo above.

Not a good pic, have to admit, the streaks are the result of the light shining on the 'pannacotta', as it looked perfectly even and surprisingly light in colour (expected it to be a deeper orange). Served on its own it is quite a respectable dessert, though the one above would have looked more appetising had it been on a coloured plate, or had a fruit coulis poured round and/or over it. Or drizzle chocolate across it the white plate in a zig-zag pattern so beloved by chefs today (and hated by Beloved) - setting the pannacotta on this.


This second picture shows my rather pathetic attempt to make the dessert look more interesting. First thought of using a Passion Fruit EasyYo Fruit 'Squirt' to drizzle over the top, but in the end chose chocolate as a 'garnish', so to save having to heat a piece of solid chocolate in a bowl over hot water, instead (for speed) heated a heaped teaspoon of Nutella in the microwave for 1 minute to make it runny, then spooned this on top, dragging it down the sides. Then just for fun dragged the 'drizzles' back and forth to give a marbled effect. Then took the photo.
After that put a mound of squirty cream on the top of, but it didn't improve the look, so didn't take a photo.

Then came the sampling. Have to say using the orange flavoured jelly was inspired as the 'pannacotta' flavour tasted rich and creamy with just a subtle flavour of orange. However it was set too firmly for my liking. A Pannacotta should be lightly set with a distinct wobble, so next time (and there will be a next time as it is so good) will either use less jelly (three quarters of a pack to make up a pint) or use a whole packet and add even more liquid (making it up to 1 pint 5 fl oz) which could be water or milk to dilute the double cream as the amount used was more than enough to make the dessert really rich. It probably would have been better (and cheaper) to have made it with single cream (next time I will use two thirds of double cream and dilute with milk).
Making just one helping is simple, just dissolve a couple of cubes from a pack of jelly in 2 fl oz water, then when cool, stir in some double cream (diluted with a little milk - or use undiluted single cream) to make it up to 4 or 5 fl oz, pour into a mould or dish, and chill until set.

The portion above turned out far too rich for me to eat it all (and that is unusual to say the least). So even just an extended pint would have been enough to make individual servings for 4 - 6 people. I reckon the jelly and double cream (counting water as 'free') wouldn't cost more than £1 to make this dessert for four. Garnishes extra of course, but then we may be able to have these in store anyway (as we would the jelly). As it is, still have half the above left to eat, plus two more in the fridge, so that will make six puds in all for me to work through this week. I may freeze one to see what happens.

It crossed my mind that a teaspoonful of Cointreau would have made this even more acceptable to the 'posh nosh' diners we might have occasion to entertain. So this is a cheat's dessert that has great potential and could be made with several different flavoured jellies. But do use cream, for otherwise it ends up as a bog-standard 'milk jelly'.


Monday, August 02, 2010

More For Our Money

Still thinking about getting the most for our money, remembered that Tesco had delivered (as ordered) two of their 'Market' cauliflowers (ie cheapest). They had looked almost identical when I put them in the fridge, so decided yesterday to weigh them.
To prove I did have two, one was put on the scales,the second seen behind.
In the first photo the scales showed one cauli weighing in at 2 lb. The second (in the next shot and closer to the camera so looks larger, but isn't) shows that this one weighs 8 oz LESS. Yet each were the same price.
Just by holding a cauli in each hand it was easy enough to discover the one that was heaviest, but as I said they did look very much the same (should have taken a picture of them side by side. But didn't. Just take my word for it.
As you know, the outer cauliflower leaves are not discarded, these and the core are chopped finely then cooked in milk until very tender, whizzed with a blender with a bit of Stilton cheese and it makes a really good soup.


This third photo is even more important as it shows a really great way to make a low-cost meal. Being asked for courgette recipes, decided to hunt one out that is very easy to make, and - after cooking this - found it made me a very respectable lunch dish for very few pence.
If you grow your own courgettes, and use a cheaper 10p egg (as I did), and have a bit of stale cheese in the fridge to grate up (although I did use the end of a piece of Parmesan), apart from fuel used for cooking (and this can be done in alternative ways) the dish costs only pennies. Keep hens as well and this dish could be virtually free (there are times I can easily forget to allow for the cost of feeding hens and fuel used for cooking - although yesterday cooked something else while the oven was on).

Read the hints 'n tips below the recipe for alternative ways of making/cooking the dish to suit your own needs. Don't overcook, as the softness of the egg contrasts with the crunchiness of the lightly-cooked courgettes, so the cooking time needs to be precise.
Egg in a Courgette Nest: to feed four
8 courgettes
2 oz (25g) butter, melted
4 eggs
grated Parmesan cheese
salt and pepper
Slice the courgettes and drop them into a pan of boiling water. When the water comes back to the boil, boil for 2 minutes and not longer. Drain immediately and line four 6" (15cm) individual ovenproof dishes with the slices, making a nest. Dribble the melted butter over them.
Break an egg into the centre of each and season with a little salt and plenty of pepper (or to taste). Sprinkle Parmesan over and bake at 200C, 400F, gas 6 for 8 - 10 minutes or until the eggs are lightly set (longer if you wish a firmer egg). Serve immediately.

Hints/Tips: to avoid putting the oven on to bake this one dish, poached eggs could be made and slipped into the centre of the 'nest', cheese put on top then popped under a grill to melt the cheese.
Poached eggs can be cooked ahead of time, then slipped into iced water and kept chilled in the fridge for several hours. When wishing to use, using a slotted spoon, remove one from the water and slip it into a bowl of very hot water, leave for one minute to heat through - then serve. Hotels cook poached eggs needed for breakfast the evening before and store/use them this way.

As I was making only one portion, to save the chore of melting butter separately, put all the drained courgettes into one dish (mine was also 6" diam) and popped a knob of butter on top, the heat melted the butter, so then arranged the then buttery slices as shown in the photograph, the egg then placed in the centre.
Same ingredients but cooked in a slightly different way would be to is to lightly fry the par-boiled courgettes in a little butter, frying an egg with them at the same time, then sprinkling over the Parmesan when plating up.